Most affiliate programs are dead before they even launch. It is imperative to ensure you have the proper foundations setup for affiliates to get start right away and achieve success.
Table of Contents
How do I want to structure my affiliate program?
- Do you want to have a single level of affiliates who join and are paid a flat commission?
- Do you want multiple levels of affiliates (MLM style) that refer affiliates and sales?
- How much percentage of a commission do you want to award affiliates?
- If you are running an MLM style affiliate program, how much do you pay each tier?
- Do you want to offer in-store credit as a payment option?
We are going to continue to utilize WordPress in our example given as well as Affiliate WP as the platform for our affiliate program. Affiliate WP is the gold standard for WordPress affiliate programs and includes a large amount of free addons and premium addons. It is the most comprehensive affiliate platform and that is why we use it.
Activate your license key and depending on the addons you are utilizing some options may be slightly different.
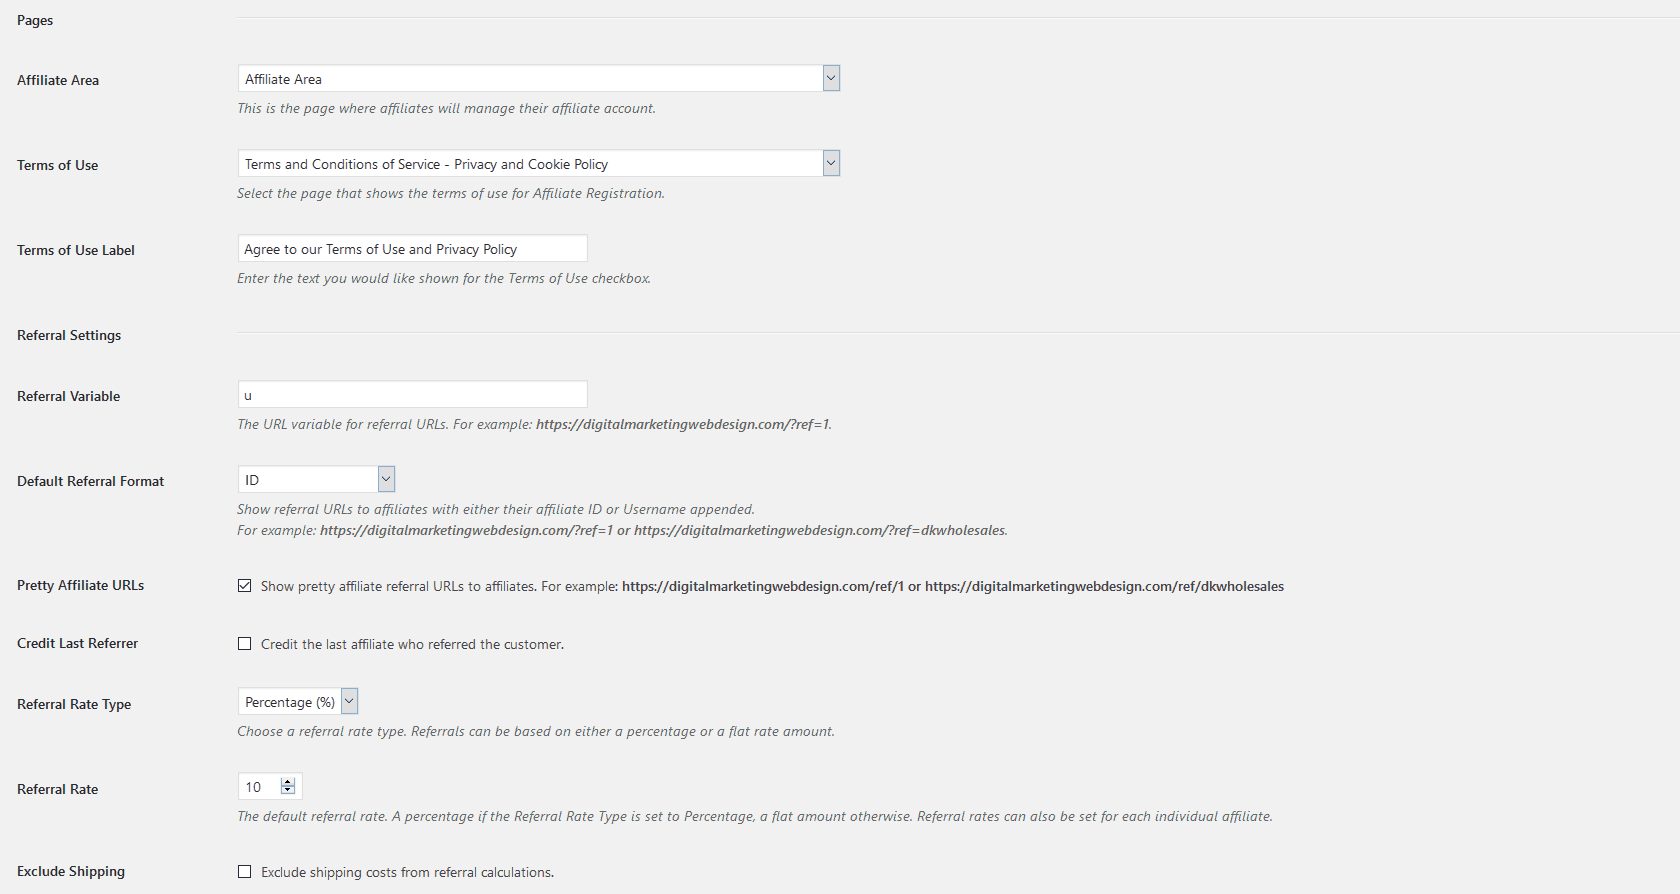
The affiliate area is where the affiliates login and view their dashboard.
Set the terms of use to your affiliate terms page.
Set your referral settings, I recommend using pretty affiliate links.
Set the referral type, I recommend a fixed percentage.
Decide how much you want to pay for each sale referred. Also keep in mind that if you are running a MLM style affiliate program the additional percentage payouts that you will configure later on.
It is crucial to look at exactly how much you can afford to pay affiliates per sale, think of it as an advertising cost, but you only pay when a sale is made.
What media buy or ad provider is going to offer that?
This is why an affiliate program is one of the most cost effective ways to drive traffic and increase conversions.
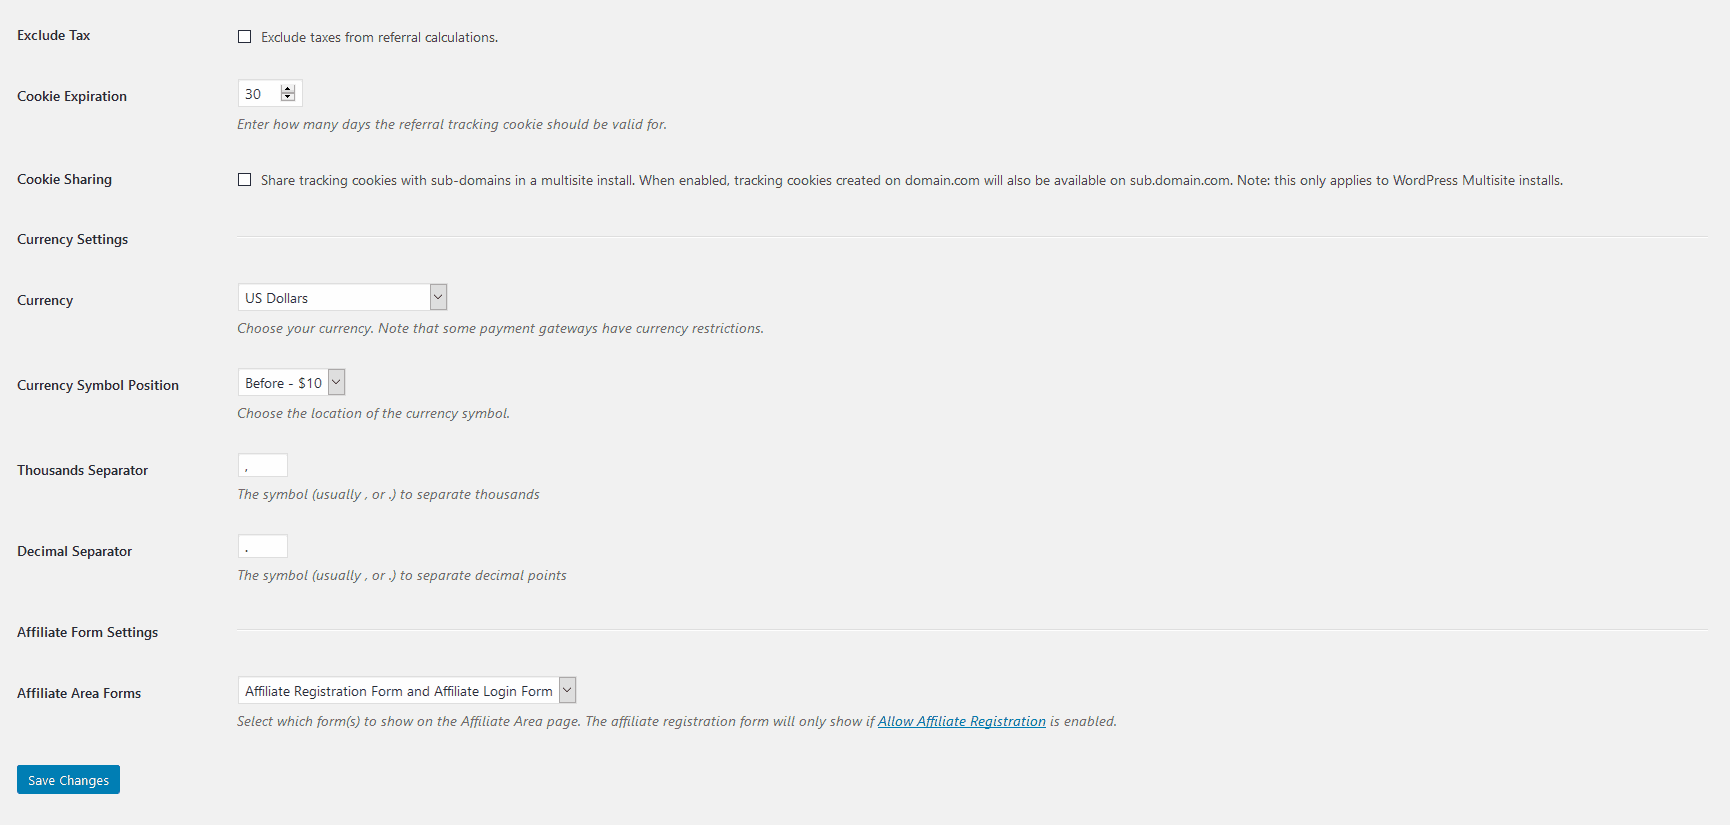
After that, set your currency and click save.
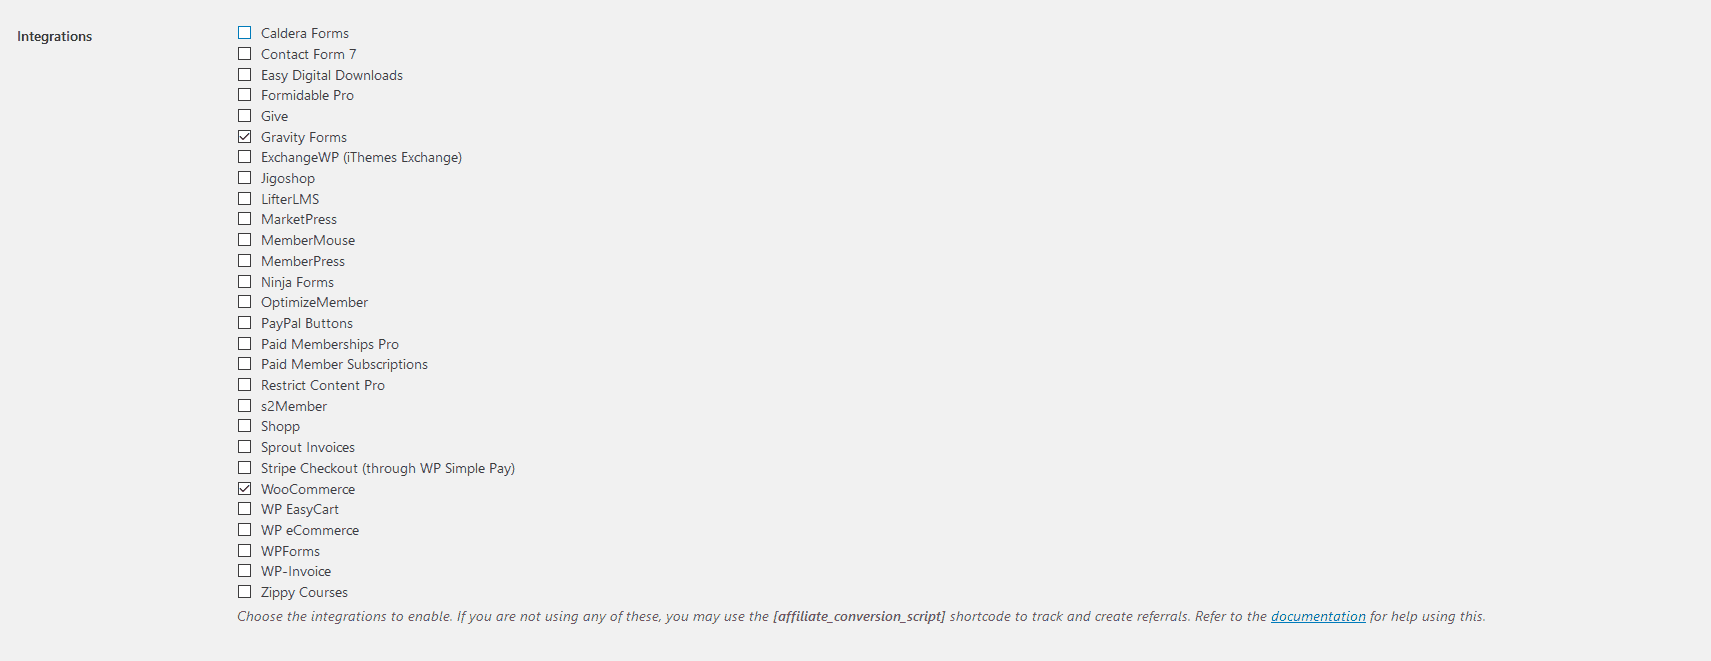
Click the “Integrations” tab and if you are using Gravity Forms, select it. If you are using Ninja Forms, select it. If you are using Woocommerce, select it. Click save.
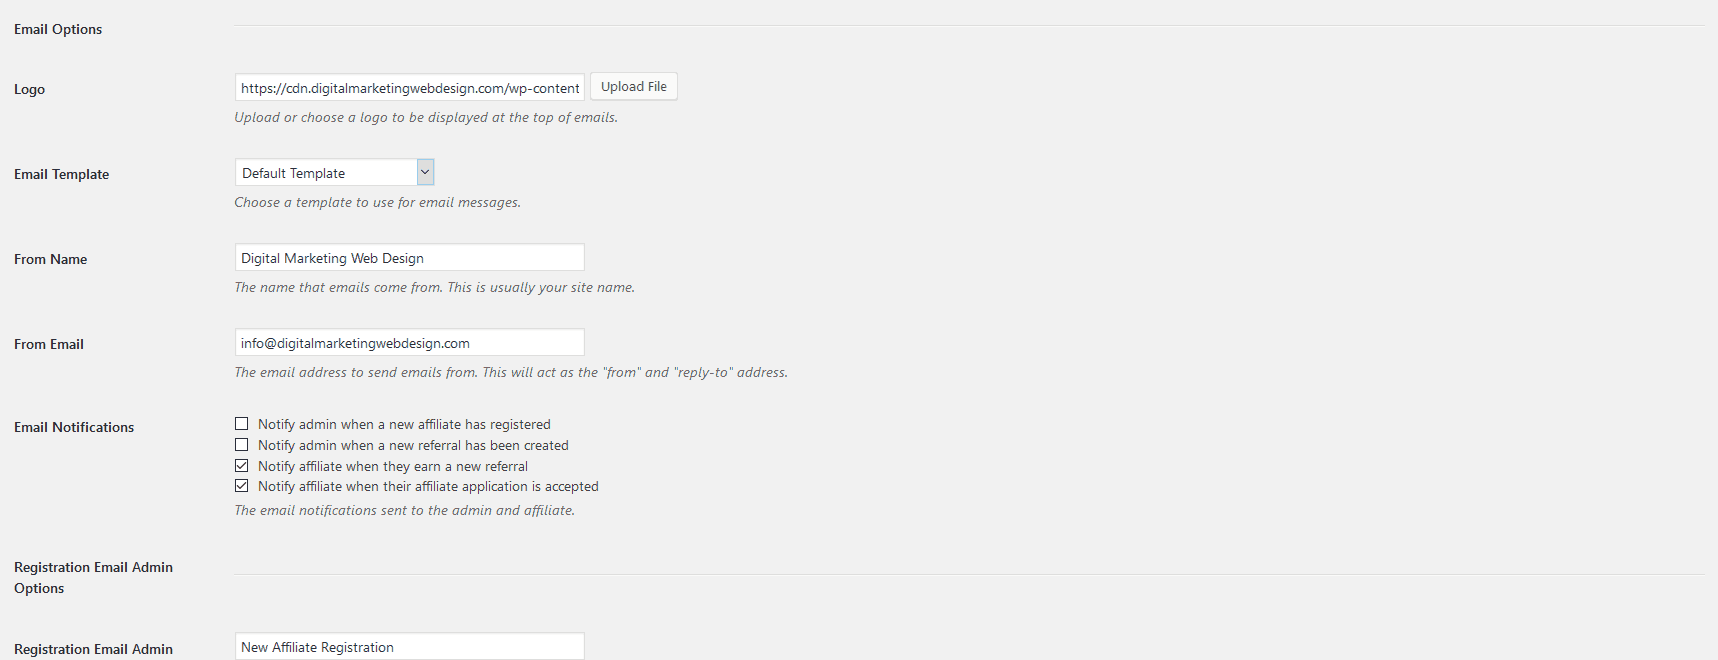
Click the “Emails” tab, look over the emails. Customize and personalize them as you see fit.
Click the “MISC” tab, here you will see a variety of options. Decide whether new users can register to be an affiliate themselves, whether new registrations require approval, as well as whether or not to automatically register users or customers as affiliates.
You can also setup recaptcha and adjust a few other miscellaneous settings. Go through them and decide which work best for your scenario. I recommend allowing users to register their own accounts, if you are selective then require approval before allowing them into the program.
If you are using the Paypal Payouts addon, then click the “Paypal Payouts” tab. This is fairly simple to setup and the documentation can be viewed here.
If you are using the Affiliate Landing Pages addon, select the “Affiliate Landing Pages” tab and enable it and click save.
If you are also using the Direct Link Tracking addon, select the “Direct Link Tracking” tab and click enable for each option. Also setup your blacklist and how many domains each affiliate can use.
Congratulations, you have completed the initial setup of your affiliate program!
[/et_pb_aio_extended]
Affiliate Program Marketing – Website Overview
Next, take an overview of your website and pages as well as your funnels, what can be improved?
In most cases, your website should have the following pages:
About Us – Talk about the origin of your company, how, when, and why it exists. What makes you different?
Contact Us – A form to contact you, a number to call, an address to visit or write.
Return Policy – If your product is shipped, can it be returned? If so, what are the conditions? If not, then why not and are there any exclusions?
FAQ Page – A frequently asked questions page helps everyone! It will help you avoid answering the same questions over and over. It helps potential customers with common questions and affiliates as well.
Privacy Policy – This is a must have, especially now more than ever. Talk about what data you collect, why, and who can access it. Also depending on your setup, talk about how to opt out of tracking and explain your cookie usage.
Affiliates should be able to earn a commission on every visible product, service, or offer on your website. However, be sure to notate any items that affiliate cannot receive a commission on within your affiliate terms.
Your offer and product pages should have a clear call to action and checkout should be streamlined to avoid additional cart abandons.
Some of the top reasons for cart abandonment is a convoluted checkout process, high shipping costs, additional costs, and requiring an account to checkout. Your checkout process should inherently inform customers that it is secure.
Your product images should be a consistent size as well as professional looking. Your description content should be informative and helpful. If you have variations, they should be easily seen and selected. Remember, affiliates will test your website as if they were a customer, these optimizations benefit everyone.
Most successful affiliates will determine whether or not to stay in your program based upon the user experience of your website and the affiliate resources page. Before you launch your affiliate program, make sure you have optimized your website for success.
Learn How To Optimize Landing Pages Here
Now that you have optimized your landing pages, it is time to get started on your affiliate resources page.
[/et_pb_aio_extended]
Affiliate Program Marketing Resources Page
What does my affiliate resource page need?
It needs to be easily implemented, in most cases copied and pasted.
A successful affiliate resource page will have the following:
- Context (Bonuses, incentives, and program information).
- Content (Articles, email blasts, and social posts).
- Creatives (Banner ads, image creatives, and videos).
Affiliate Program Context
Your affiliate program resources page needs to have context.
The program information section should include current pertinent information about the affiliate program such as:
- Current Bonuses
- Current Incentives
- News & Updates
Affiliate Program Content
Text articles should follow the guidelines of content marketing with all roads leading back to your offer. View our Content Marketing 101 lesson to make the most of your content.
Email blasts should be quick and to the point, including a copyable subject and message for the affiliate to quickly and easily load into their own system and send it to their contacts with minimal effort required on their part.
Social posts should be proving, informative, and contain a strong call to action.
Affiliate Program Creatives
Some of the most popular banner ad sizes include:
- 300 x 250 – Inline Rectangle
- 468 x 60 – Banner
- 728 x 90 – Leaderboard
- 120 x 600 – Skyscraper
- 160 x 600 – Wide Skyscraper
- 250 x 250 – Square
- 200 x 200 – Small Square
- 336 x 280 – Large Rectangle
It is best to at least have one of each.
Image creatives can be shared on blog posts or on social media, so it is imperative to make them in sizes appropriate for each network.
Social media image sizes:
- Facebook Post – 940 x 788
- Instagram Post – 1080×1080
- Pinterest Post – 735×1102
- Twitter Post – 1024×512
Videos can be uploaded to blogs and shared on social media as well. It is crucial to make sure each video has a purpose and meets that purpose.
[/et_pb_aio_extended]
The Affiliate Manager
The affiliate manager is the go-to person for your affiliates.
Whether you are the affiliate manager or you plan to hire one, there needs to be one.
An affiliate program is only as strong as the affiliate managers.
An affiliate manager must be able to:
- Be available
- Reach out to newly joined affiliates
- Engage current affiliates
- Always find and engage with potential affiliates to grow the program
- Think of new ways to improve the program
- Help in any way possible
Finding new affiliates with affiliate program marketing outreach
The best places to get started recruiting new affiliates is with your existing customers. Create a launch email through your email marketing provider explaining the benefits of your affiliate program and send them an invite to join your affiliate program.
Then move on to social media to recruit new affiliates
Start by creating a social post announcing your affiliate program to your followers. (You can use your affiliate launch email for inspiration). Then post your social post on each network that you are active on.
After that, begin messaging your followers informing them about your affiliate program (the perks and benefits) and how they can join it.
After that you can begin to search for pages related to your niche and other popular influencers that may be interested in joining your affiliate program. Take the time to create as much as a personalized message as you can for this part, as these individuals are not following you and may not have heard of your brand, they may need an additional incentive to join.
Now start contacting bloggers and other non-competitive websites in your niche
If you ran a website that sold sea salt, you could go to Google and type in terms that are related to your offer such as DIY sea salt scrub, DIY sea salt bath bomb, and DIY salt spray. These would return a list of news sites, blogs, and how to websites. If you filtered out everything, but the blogs, you are left with a great resource of websites that are relatable to your product.
If you cannot think of any terms that would be related to your offer, then use Pinterest for inspiration.
Once you have the terms that are most relevant to your niche, it is time to get started. Begin searching and filtering out everything, but the blogs. What you will be left with is your Outreach List.
You can then begin to manually contact each website through email or their contact form, or both! Try to create a personalized message for the best response.
[/et_pb_aio_extended]
Automating Affiliate Outreach
Finding new affiliates can be difficult and time consuming, automation can help reduce the workload.
By automating your affiliate outreach, you free up more time for you or your affiliate manager to take care of other important tasks related to your business.
It all begins with using this tool to automate the process of finding, checking, and submitting your message to websites.
After you activate your license, it is time to setup your software.
Click options and set your global blacklist, it says to enter only domains, however I use the .gov and *.gov to block .gov sites from being submitted to.
If you are using your personal computer to submit, you will want to set the threads much lower most likely. I would recommend starting with 20 search and 30 submit threads, then adjusting it from there as you see fit.
In the new project area, you can decide whether or not you want to use proxies.
Why would you want to use proxies? Google will temporarily not allow you search on the search engine if you make too many requests within a short period of time. Whether or not you use proxies is completely up to you. You can order highly anonymous proxies that are geo located. That means you can order them for specific locations, which makes it a much more efficient and secure proxy. You can buy proxies here, plus take 10% off any order with code geoanonymousproxies.
If you decide not to use them, this software is still incredibly more efficient than doing it manually and if you were able to submit the same amount of requests manually, you would encounter the same issue.
Enter in your keywords you want to search for, you can also add “contact” or “contact us” to your keyword to get results with contact pages.
Select the search engines most relatable to what you are offering. I recommend selecting only search engines that are the same language as your message for best results. It is important to select multiple search engines to achieve the highest amount of submissions. Left click in the table on the “Search Engines to use” section and select the search engines that match your target language. You can duplicate your project after and select other search engines to optimize your results.
Click “Filters” and decide which filters you would like to use to narrow your results. Using filters is necessary otherwise you will be wasting your time and resources sending messages to individuals who may not speak your language. After you set your filters, then it is time to prepare your Submission Content.
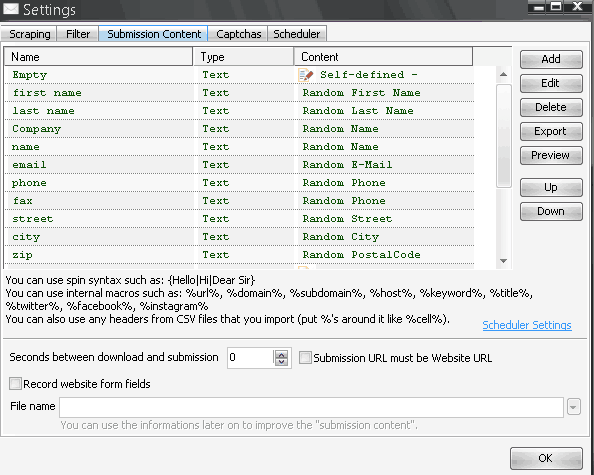
Click “Submission Content”, you can leave certain fields random to randomly generate the necessary data to submit the contact form. However, depending on the message you are sending you may want to customize and personalize certain fields, so that it is more in line with your script. It is completely up to you how to customize and personalize your message.
If you choose to leave everything random, be sure to scroll down and set your “Subject” and “Message” as those cannot be random and are what you are sending through the contact form to be read by the end user. You have to set these in order for your message to be received properly!
Make sure your message explains your affiliate program and incentives them to join it.
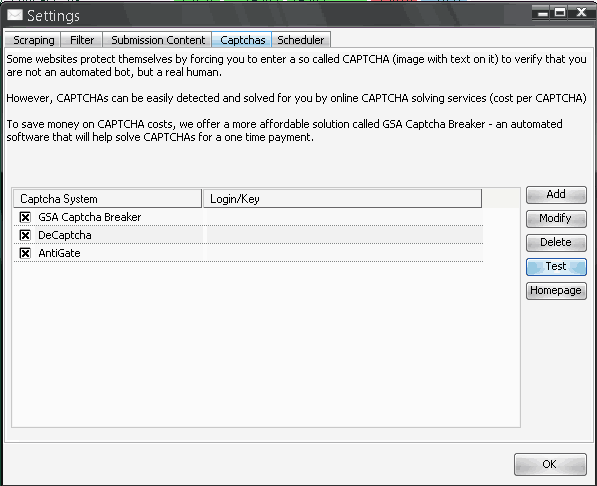
Now that you have set your Submission Content, click the “Captchas” tab. Contact forms can have captchas attached to them that need to be solved in order to submit your message. If you do not want to use software or a service to solve these for you automatically in real-time, then click the “Add” button and select manual input. This will allow you to manually solve the captchas as needed by the system. If you want to use a Captcha service, I recommend purchasing this tool as well as this tool to solve the more difficult Recaptchas. (These tools come in handy all the time for projects outside of submitting contact forms). However, if you are on a tight budget, then you can purchase this tool only.
After you activate your license(s), click the Add button and set the service. For the CapMonster tool, you will select the services in the image example as it emulates them, only add the GSA service, if you purchased the first tool.
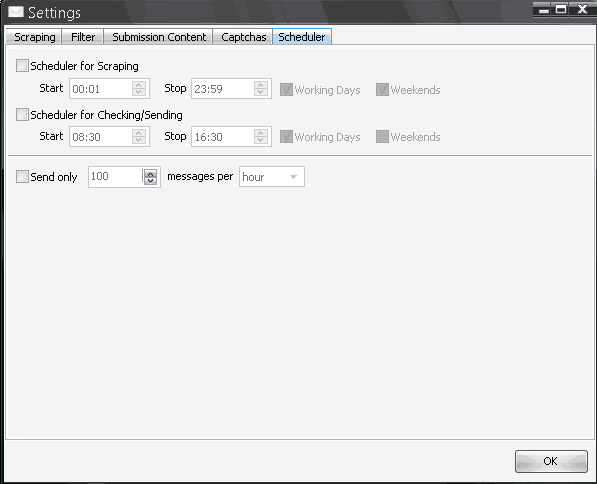
You can use the scheduler to schedule separate jobs for checking and sending as well as limiting the number of messages sent per hour. You can use the scheduler to help avoid temporary bans in the search engines. You can use the scheduler exclusively to run your projects.
If you did not use the scheduler, click “Ok” and then click “Start”, on the main dashboard. Select which type of action you want to complete, whether to look for new sites, check them for contact forms, send your message, or all of the above. After you select, your project will begin. If you selected to send the message, you will need to confirm your message, when the message preview window pops up.
After that, your project will begin. Depending on the level of automation you utilized, you have basically automated the entire process, the only thing left to do now is wait for the responses.
[/et_pb_aio_extended]


